Fixation of coral spats with resin for synchrotron radiation imaging (BAMline)

Using the EpoFix Resin and following the EMS instructions for the preparation of the resin.

Ten days old spats of the coral Stylophora pistillata were fixed with resin for synchrotron radiation imaging (BAMline) at BESSY II in Berlin.

Samples preparation

  • Take one filtered tip (20 µl) and cryotube (2ml) per each sample. Cut the top part of the tip (this is where the spat will be placed) and the bottom part of the tip.
  • Fit the bottom part of the tip in the lid of the cryotube. If necessary cut more of the bottom-tip to ease the interlock.
  • Mix 15 parts of resin with 2 parts of hardener in a 2 ml tube. At this point bubbles will form, so use a vacuum system to remove them.
  • Put a drop of resin mix at the top of the tip using a Pasteur pipette.
  • Gently place the coral spat at the top of the tip using a razor blade.
  • Gently add a drop of resin mix on the coral spat, wait for the resin to drip down the pipette. Add a second drop.
  • After 1 hour add a third drop, make sure that the resin doesn’t drip down (the resin is almost solidified at this point).
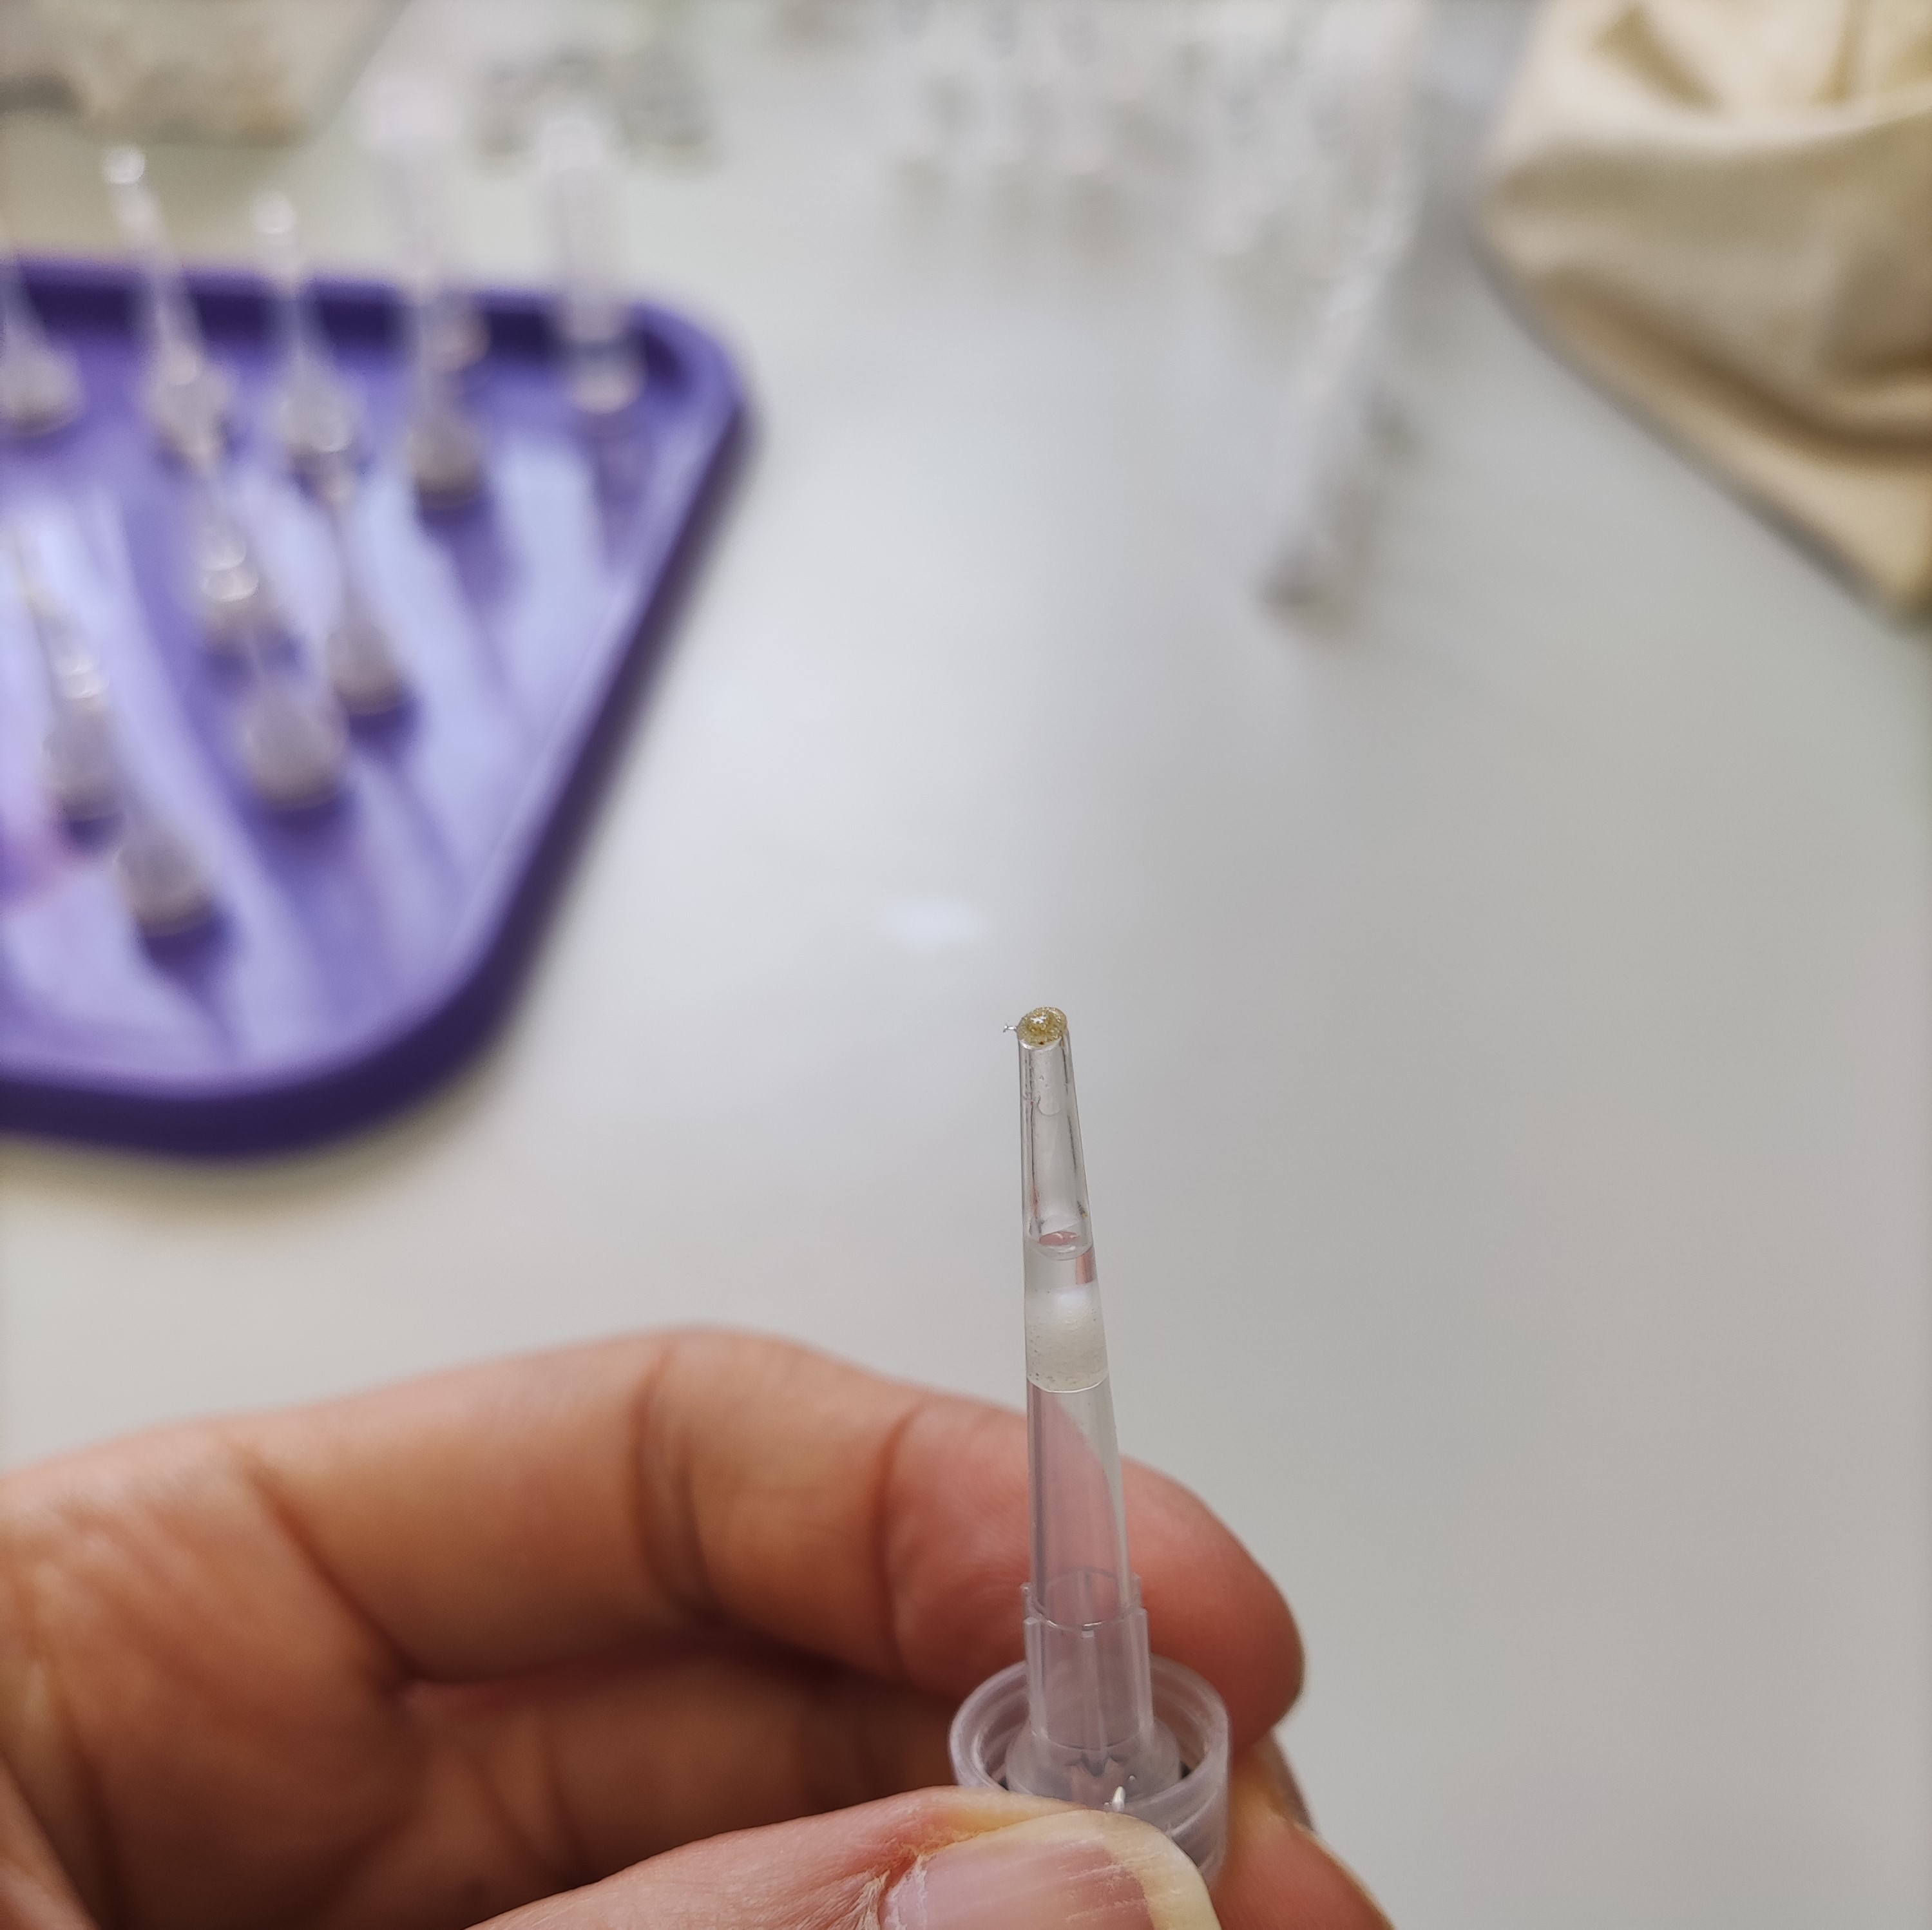
sample

  • After 24 hours insert the tip + cup into the cryotube and close it. Your samples are ready for synchrotron radiation imaging!
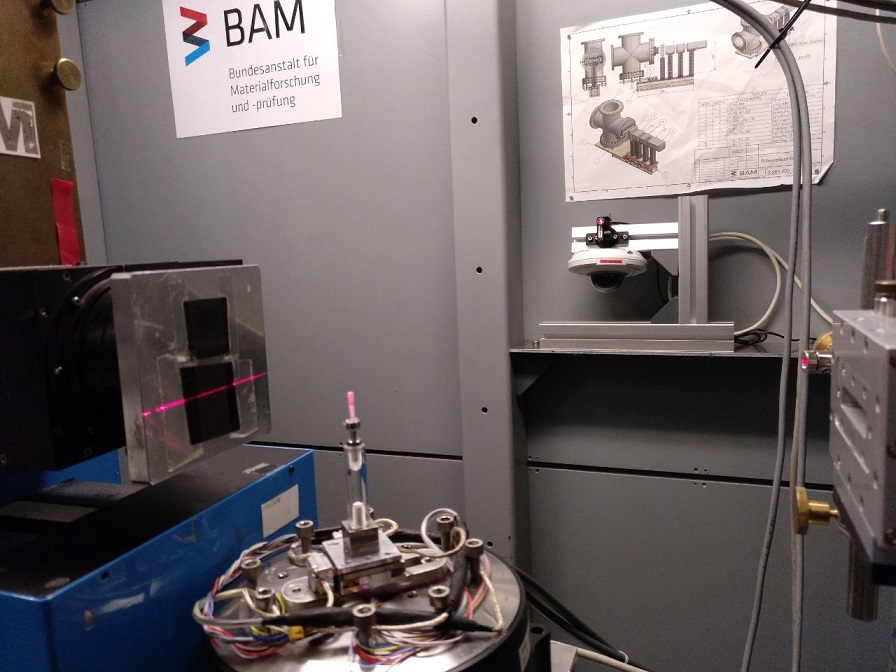
synchrotron

Read More

Sample prep Fixation embedding and polishing protocol follow Mass et al 2017 PNAS

Standard Marine Fixation

Chemicals Needed:

10 ml ampoules 16% Formaldehyde -EMS Sciences Cat #15710 Sodium Cacodylate Trihydrate bioxtra10 g - Sigma Cat #C4945 Na2CO3 Epofix

To Make Up Solutions:

22 g/L Na2CO3 in water filtered 0.2um

0.05M Na Cacodylate Buffer in 22g/L Na2CO3 Add 10.7 gms Cacodylic acid (to 1000 ml 22g/L Na2CO3)

To Make Up Fixative:

2% Formaldehyde in Sodium Cacodylate Buffered Sea-Water Fixative Add 10 ml ampoule of 16% Formaldehyde to 70 ml of the made up buffer

Fixation Steps

  1. Place samples in fresh Formaldehyde fixative and keep it at RT 0.5 hrs
  2. Rinse with buffer (2 changes at 5 mins each)
  3. Dehydrate in 50,60,70, in 1g/L of Na2CO3 in 0.002M Na Cacodylate Buffer, 15 mins for each step
  4. 80,90, in 0.5 g/L Na2CO3 in 0.002M Na Cacodylate Buffer and 100% x2 Ethanol
  5. Vacuum the sample for 3 min to evaporate the ethanol.
  6. Usually we make up the resin (follow kit directions) when the samples are in 90% ethanol.
  7. Transfer into embedding resin (3 changes at 5 mins vacuum)

Embedding Steps

  1. Measure amount of Epofix resin needed in a Dixie paper cup. Usually 8-10 grams is enough for one sample.
  2. Calculate 3/25 amount of the resin to be the amount of hardener to add. Zero the balance and add the hardener into the cup. Take the cup and go upstairs.
  3. Stir the mixture with a glass rod vigorously and make lots of small bubbles to ensure proper mixing. It usually takes 2 minutes
  4. Place the cup in the desiccator (take the rod out) and pump it down for 5 minutes, then vent, and repeat 3 times. When venting, open the valve to ~2/3 of the full valve. There should be some bubbles only the surface by the end of this stage.
  5. Take the epoxy out of the desiccator. Use a plastic pipet to drop the epoxy into the mold with the sample in it. Avoid bubbles as much as possible. Put enough epoxy to cover the entire sample. You can use the plastic pipet to remove some bubbles if needed.
  6. Take the mold with epoxy filled and put it in the desiccator and repeat step 4 (pump 5 mins each for 3 times). After 3 times of pumping, leave the sample inside the desiccator for 12-14 hrs to cure.

Polishing Steps

  1. Start with the coarse sandpaper. Rinse with 22g/L Na2CO3 solution. Grind the back of the sample to make it flat first. Then grind the sample side until the desired surface is exposed. Add 22g/L Na2CO3 solution during the grinding to keep the sandpaper wet. Press the sample with suitable force but keep in mind that the coarse sandpaper can remove materials very fast.
  2. After the desired surface is approximately exposed, change to the fine sandpaper. Same as the previous step, add 22g/L Na2CO3 solution during the grinding. This step should remove all the large scratches from the last step, and the sample surface should appear foggy at the end of this step.
  3. After grinding, move on to polishing with aluminum oxide particles. Change the sandpaper to the felt pad and add 0.3 µm Al2O3 suspension with Na2CO3 solution. Use hand to spread it across the felt and start polishing. Add 22g/L Na2CO3 solution during the grinding. Moderate force is important: if the force is too small, it will be difficult to remove the scratches from grinding; if the force is too large, alumina particles can get stuck in the sample and create pits on the surface. Polish until a shiny mirror surface is observed and no obvious scratches can be found.
  4. Move on to the final polishing with 0.05 µm Al2O3 suspension. Same procedure as the previous step, but remember to change the felt to the one for fine polishing and don’t mix up with the previous pad. It’s difficult to judge if this step is done by naked eye, so you can use the microscope to help. Usually if there are no scratches under 20× it should be good enough.
  5. After polishing, clean the sample with a series of wipes. Prepare 4 wipes with the following order: wet with Na2CO3 solution, dry, wet with ethanol, dry. After polishing with 0.05 µm Al2O3, clean the sample through these wipes as the order above. Gently wipe once on each wipe. If there are watermarks or weird patterns on the surface, it means that the cleaning was not done properly so you need to repeat this step.
Read More

Coverslips coating for Coral tissue culture

Laminin Solution

Laminin (Sigma # L 2020, 1mg/ml) Aliquot into 20μl units Store at -20ºC • Add diluted Laminin solution to cell suspension at a ratio of 1 part Laminin solution to 3 parts cell suspension.

Sodium borate solution (0.19M)

7.6 g Na2B4O7 (Sigma # 221732) 200ml DDW pH 8.2

Poly- D- lysine solution (1mg/ml)

10mg Poly-D -lysine (Sigma# P 1024) 10ml Sodium borate solution Filter Sodium borate solution only Keep for 30 minutes at room temperature, Store at -4º

Borate Buffer pH 8.5

2.375g Na2B4O7*10 H2O (Sodium Tetraborate) (Sigma # S 9640) 1.550g H3BO3 (Boric Acid) (Sigma # B 6768) 500ml DDW pH-8.5 with 1M HCL
Filter and store at 4◦C

PolyEthylenImine (PEI) solution (100μg/ml)

0.1ml or 0.107g 50% PEI (Sigma# P 3143, 50ml)
49.9ml Borate Buffer Aliquot into 1ml amounts, Store at -70◦C Before using : thaw 1ml aliquots and add 9ml Borate Buffer Store rest at -20◦ C for no more than 1 mounth.

Coating coverslips

Use about 50μl/cm2 Poly-D-lysine / Poly-Ethylene-Immine solution Coat overnight at room temperature, Aspirate solution using sterile Pasteur pipette
Wash in DDW, Dry with sterile Pasteur pipettes.

Read More

Coral tissue culture protocol follow Mass et al 2012 PlusOne

Using the DMEM no glucose and antibiotic-antimycotics

Prepare CaFSW

Add the follow to 1l of deionized H2O and filter with 0.2µm keep stock in 4C and worm to 25C before using

chemical gram
NaCl 23g
KCL 0.763g
MgSO4-7H2O 1.89g
MgCl2-6H2O 10.45g
Na2SO4 3g
NaHCO3 0.25g
SrCl2 0.026g

DMEM culture medium

Add to DMEM no glucose (https://www.thermofisher.com/il/en/home/technical-resources/media-formulation.49.html) the follow

|chemical|gram|comment| |NaCl|9.05g| |KCL|0.7g| |CaCl2 2 H2O|0.71g| |MgCl2-6H2O|5.1gg | |Na2SO4|0.5g| |taurine|0.5ml|from stock 1.04µg/20ml DDW| |NaOH3-|1.85g|only if necessary, if the DMEM bought is without NaOH3| |Hepes|2.98g| Keep stock in -20C

Working solution

Dilute the stock DMEM culture medium to 12.5%(vol/vol) in ASW: 20ml DMEM + 140ml ASW

Add to the diluted DMEM mix :

  • 1.25% FCS
  • 1% antibiotic-antimycotics (1.6ml)
  • 5mM glucose (For DMEM without glucose)
  • 20 µg/ml aspartic acid (0.0032g)
  • 50 µg/ml ascorbic acid (0.008g)
  • 1:100 L-Glutamine (1.6ml)
  • Final pH 8 – monitor gently with NaOH 1M or NaCl 1M
  • Filter all the medium in 0.2µm

Tissue culture preperation

All work must be done in the biological/laminar flow hood with filtered medium All tips should be stored in the hood. Tips, pipettes, etc. should be exposed to UV light for at least 10 minutes

All medium need to be in 26C

Work with 6wells or 5ml petri-dish

  • Wash 0.2-0.7 cm long nubbins or fragments of nubbins for 15 min in PVP-Iodine
  • 2 min wash in FASW and 1 min in DDW.
  • Repeat this step if necessary (this steps are done in order to get rid of all the ciliates in medium)
  • Pre Incubate nubbins for 4.5 h in CaFSW +3% antibiotics (slow rpm in room temp)
  • Transfer the coral nubbin to culture medium (26C)
  • Incubate in humidified chamber/incubator with 12/12 h light dark cycle at 26C for 48h.
  • The tissue might fall of the skeleton and if not take it off by gentle pipetation. Take out the skeleton homogenize solution and add a drop of PVP-Iodine for 15 min.
  • Transfer the medium to 15ml tube and spin down the medium contains the cells (5 min 500g in RT).
  • Change the medium with fresh one
  • Filter (0.2µm) the medium with the cells to a sterile plate (1ml to each plate) and add 4ml of fresh medium
  • Incubate in humidified chamber with 12/12 h light dark cycle at 26C and change medium every 3 days.

cell culture

Read More

Known biomineralization-related genes list

This list comprehends all biomineralziation-related genes known from literature. The first reference is the one related to the accession number/gene ID, then we put all other references where that specific gene/protein was previously detected/immunolocalized (chronological order).

List preview:

list

Read More